Robotics Makerspace Training at Ford Motor Company Robotics Building
Published:
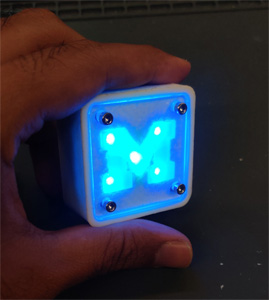
Crafted an Illuminated Cube: Harnessing Rapid Prototyping to Sculpt a Stunning 'M'-Emblazoned Masterpiece.
My second day at the University of Michigan marked the begnning of an exciting journey in the world of robotics. I enrolled in the ROB 550: Robotics System Lab course, and the very first task was to complete Basic I and Basic II training to gain access to the Robotics Makerspace.
What makes this course truly remarkable is that it seamlessly blends theory with hands-on experience right from day one. While I had prior experience with 3D printing, working with metal and acrylic with a laser cutter was a whole new adventure. In this blog post, I'll take you through the steps I followed to create a light cube with the letter 'M' engraved on it.

Step 1
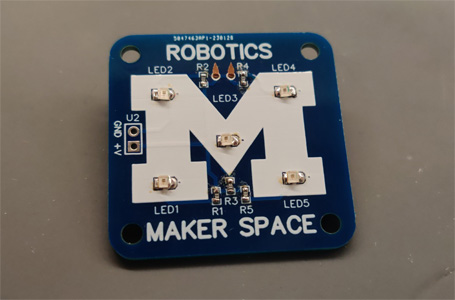
First I use the Fablight laser cutter to create the connection lines for PCB containing LEDs and CR2032 battries. It was my first encounter with such a high-power machine, and the precision of the results left me thoroughly impressed.
Step 2
Moving on, I utilized a CO2 laser cutter to craft the top of the cube. This step also involved engraving the letter 'M' on the top surface, which would beautifully reflect the light emitted by the five SMD LEDs.
Step 3
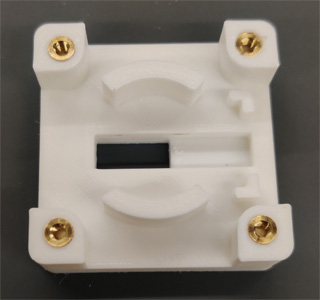
For the main casing of the cube, I turned to 3D printing, as it demanded quite some time we were already given the casing but the toggle switch was ours to print.
Step 4
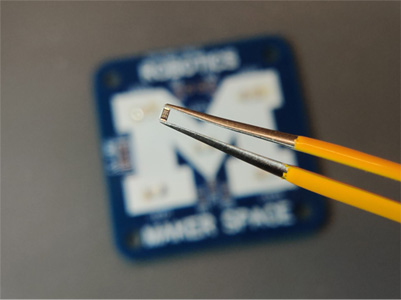
Perhaps the most challenging phase of the project was step four, which required intense concentration. Soldering SMD components with a soldering iron can be tricky, especialy when working with such small components. While the LEDs posed relatively fewer challenges, soldering the resistors demanded a steady hand. To achieve precision, I developed a technique: applying solder to one pad first, then carefully positioning the SMD component with tweezers and reheating the pad. At the end I took some wipes with Isopropyle Alcohol and cleaned up the PCS.
Step 5
The final step involved assembly. I used hex bolts and brass inserts to enclose the box, securing the PCB and the engraved acrylic sheet. This entire experience was incredibly empowering, granting me access to powerful machines that will enable me to embark on even more creative and intricate projects in the days to come.
In essence, my journey into the world of robotics at the University of Michigan has only just begun, and I can't wait to see where it leads me. With each step, I'm gaining not only technical skils but also a profound sense of accomplishment and the ability to bring my ideas to life. Stay tuned for more exciting projects and updates! Go Blue ...